 You probably read about our DefCon 26 project already (if not, or as a reminder, it’s here), but I wanted to add my own take and commentary to it, and that seems like a fitting first post for Sunfire @ Hitsaru, so here goes.
Well, that there on the left is me, attempting to take a selfie in the mirror at our hotel room, so that all those people I’d only met online would know how to spot me in person. And it worked – I lost count of the “I recognize the hair” greetings I got.
But this is supposed to be about the vest itself, and maybe a little about the Pi and display panel, right? Right.
Hatching the Plan
So as mentioned in Rego’s post, until we knew that the theme for DefCon was ‘1983’, we weren’t really sure what the carry mechanism would be. We talked about a fanny pack, or a small bag one of us would carry, but comfort and longevity of wear were important. And what’s more 80s than a bleached denim vest with ripped sleeves? Exactly. So I found a mid-weight denim shirt at a thrift store (a jean jacket would have been too heavy for summer in Vegas, even indoors), cut off the sleeves and frayed the shoulders, then gave it a nice 4hour bleach bath.
Next, the components. While Rego was working on the code for collecting MACs, and eventually the code to talk to the display panel, it was up to me to put my domestic hacking skills to the test. How to attach/carry the components and run the wires? Well, the 2 front pockets worked great for balancing the weight of the battery pack and the Raspberry Pi.
Putting it together
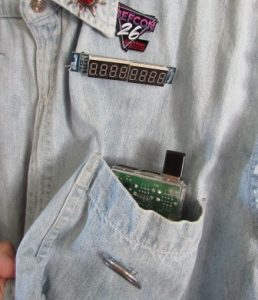
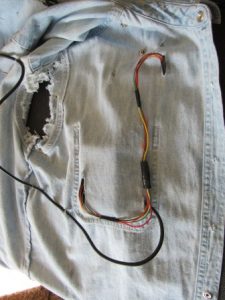
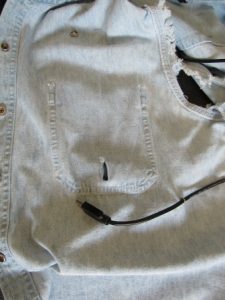
As you can see in these photos, the Pi rested in the pocket below the display panel. I stitched the panel to the vest, and added a slit for the bundle of jumpers to be able to connect to the back. I had to add the safety pin to the top of the jumper bundle, because otherwise the weight forced the display to point upward instead of forward. The second photo shows the back of the Pi pocket, with jumpers running into the pocket next to the 40-pin connector, and a long USB cable running out to the battery for power. And the last photo shows the back of the pocket where the battery pack rested, with another small slit to run the cable through.
A nice thing about the display panel that we picked up was that I only needed to run 5 jumpers to the Pi. Because most of the jumper cables around here are already loose, I picked 5 different colors, which made it easier to follow the pin-outs to where they needed to connect on the Pi. Toss in some electrical tape to keep it neat, and we’re good to go.
Because we were building it fairly last-minute, I didn’t spend as much time on making it great as I could have. For instance, the long USB cable had to run along the back of the vest for maximum comfort. I could have run it up along the neck, but I knew the weight of badge(s) hanging up there would force the wire into my shoulders and that wouldn’t be great for long days of wearing it around. We also used the absolute longest cable we had (because the next shortest one wasn’t long enough), which turned out to be way too long. So to compensate for the length, and the need for the vest to still be flexible, I stitched the cable in place under the armpits and then in a sort of wave along the back. 2 important lessons from that:
[1] Make each stitch a little tighter to prevent moving – I was worried about crimping the cord too tight.
[2] I should use a lot more than 5 stitches across the whole thing – take the time to make it stay put.
More than once I needed to adjust the cables for control and comfort (particularly under the armpit).
Finishing Touches
My finishing touch was to cover the thing in buttons. A small yet fun way to express oneself, I’ve been known to collect buttons since early childhood. To match the theme, I put my most 80s-ish ones on the back (can we say line-con conversation starter? totally worked more than once…) and all the DefCon-related ones on the front. [I moved Free Hugs to the front so that people would first ask instead of sneak-attack-hug from behind – personal safety issue.]
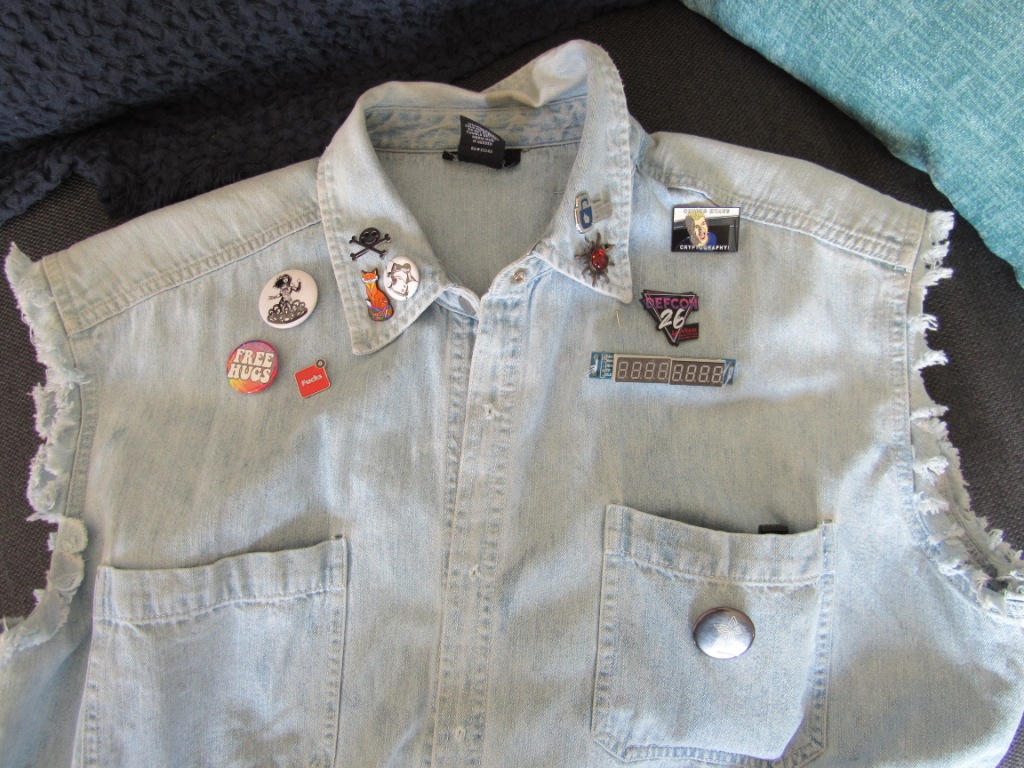
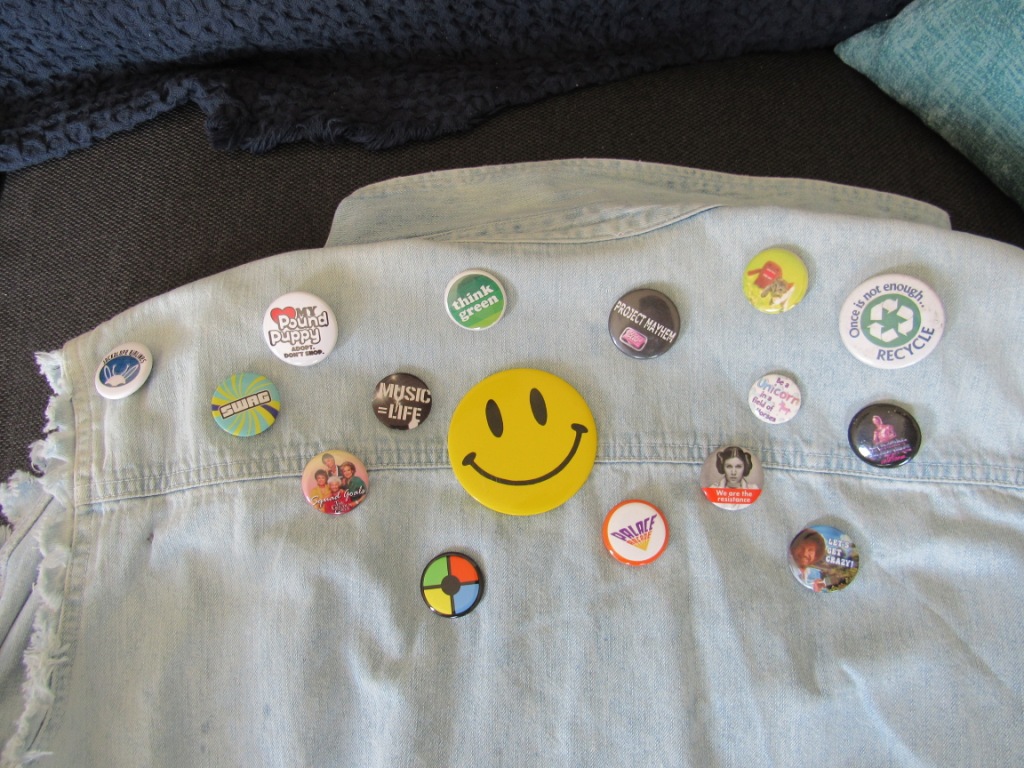
These photos were taken after we got home, so a few buttons shown were new additions during the con. Notedly:
[1] zero fucks, thanks to Miki (@theDawgCr8)
[2] The Diana Initiative (@DianaInitiative)
[3] the DefCon 26 Limited Edition pin (forgot from which vendor we got that one)
[4] Jackalope Airlines (@djjackalope)
So there you have my first post, my domestic hackery, and a little bit more about our project from this summer. See you next time.